A very informative video
http://www.rcgroups.com/forums/showthre ... 398&page=2
| RC Slope Soaring in Hong Kong http://www.rcsail.com/forum/ |
|
| Making your own boom http://www.rcsail.com/forum/viewtopic.php?f=15&t=1628 |
Page 1 of 2 |
| Author: | Yeung [ Tue Jun 30, 2009 2:37 pm ] |
| Post subject: | Making your own boom |
A very informative video http://www.rcgroups.com/forums/showthre ... 398&page=2 |
|
| Author: | CM Cheng [ Wed Jul 01, 2009 7:45 am ] |
| Post subject: | |
原來錄影帶可以咁用 |
|
| Author: | Ah Pong [ Fri Jul 03, 2009 6:14 pm ] |
| Post subject: | |
Just finished the fuselage today, will make the boom soon. 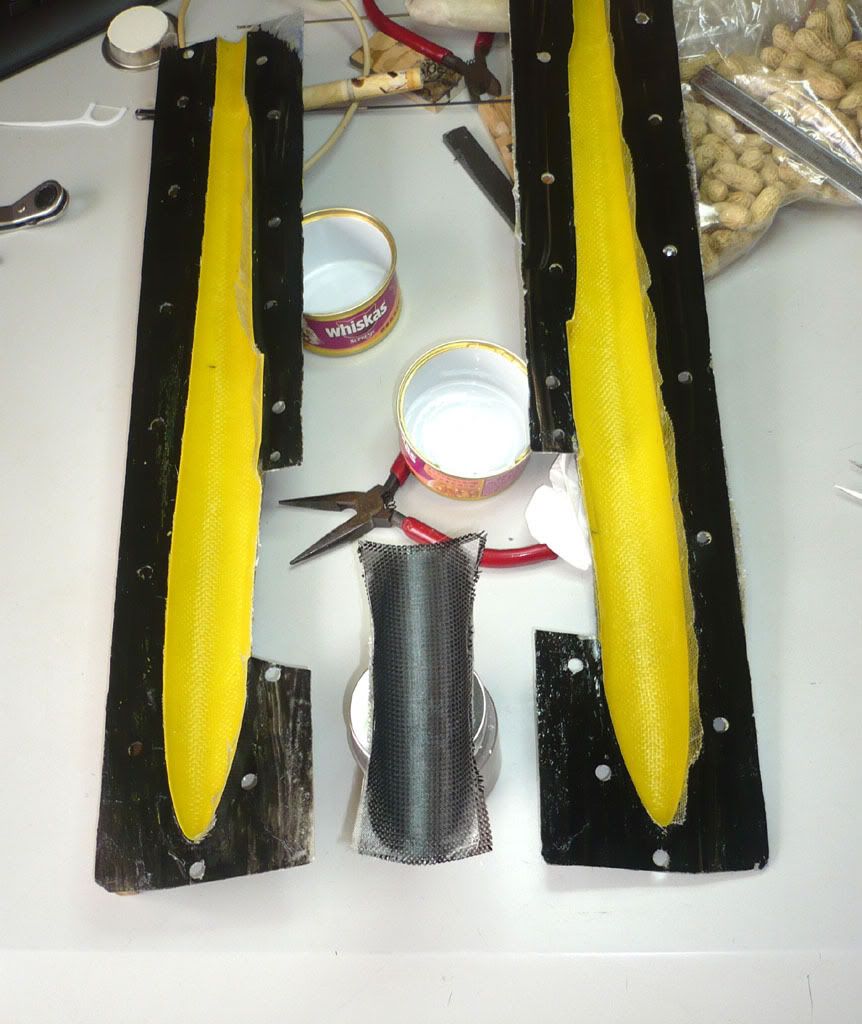
|
|
| Author: | CM Cheng [ Fri Jul 03, 2009 6:28 pm ] |
| Post subject: | |
What is the purpose of the peanut |
|
| Author: | Ah Pong [ Fri Jul 03, 2009 8:19 pm ] |
| Post subject: | |
Hi CM, Quote: What is the purpose of the peanut
Peanut is the best friend of BEER, and BEER is one of my good friends. |
|
| Author: | Stanley [ Fri Jul 03, 2009 10:08 pm ] |
| Post subject: | |
Ah Pong wrote: Hi CM,
Quote: What is the purpose of the peanut Peanut is the best friend of BEER, and BEER is one of my good friends. Oh! All these stuff are NO good to health, take care, dear! |
|
| Author: | Ah Pong [ Fri Jul 03, 2009 10:24 pm ] |
| Post subject: | |
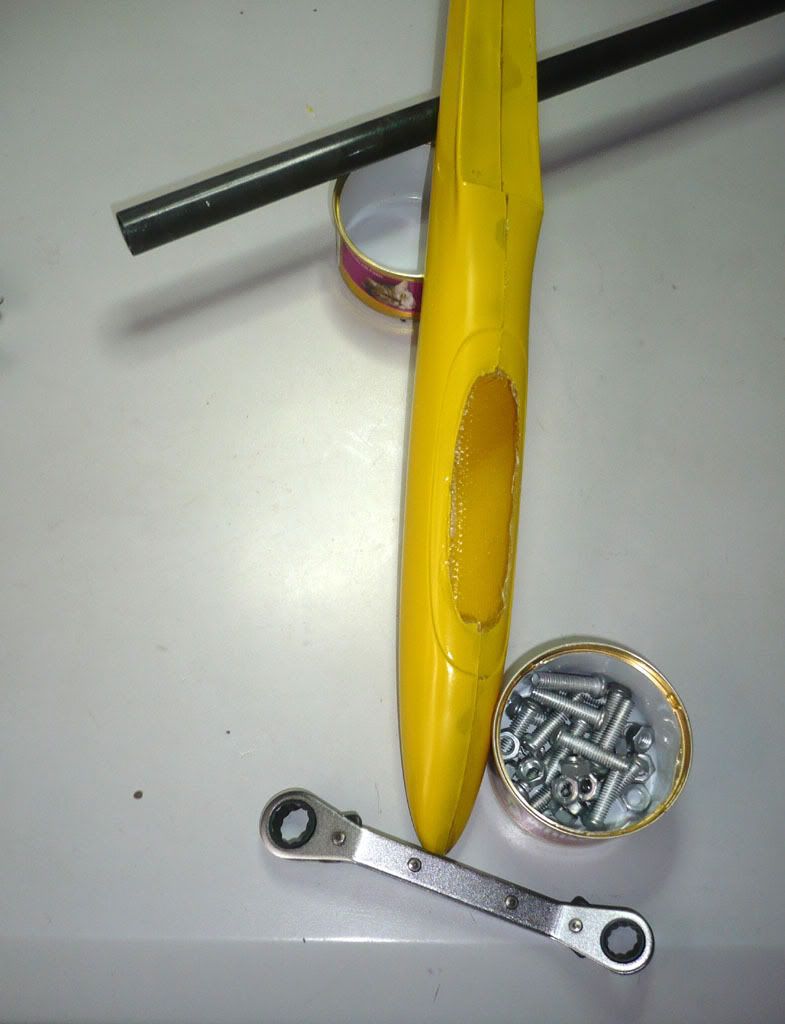
The canopy : 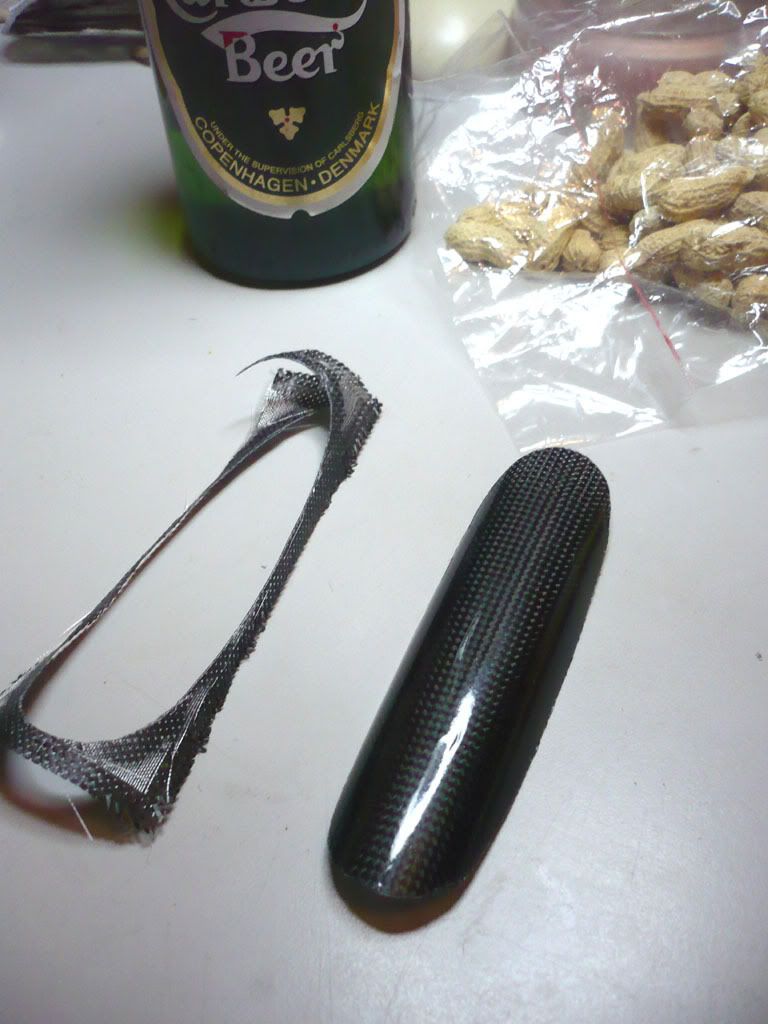
|
|
| Author: | Ah Pong [ Fri Jul 03, 2009 10:25 pm ] |
| Post subject: | |
Hi Stanley, I am having my vacation. Drinking beer and building models, what a day. |
|
| Author: | CM Cheng [ Fri Jul 03, 2009 11:33 pm ] |
| Post subject: | |
Stanley wrote: Ah Pong wrote: Hi CM, Quote: What is the purpose of the peanut Peanut is the best friend of BEER, and BEER is one of my good friends. Oh! All these stuff are NO good to health, take care, dear! Stanley, See what's on Pong-pong's T-shirt . .. . 
|
|
| Author: | Ah Pong [ Thu Jul 16, 2009 10:30 pm ] |
| Post subject: | |
Hi folks, Here is my vacumum bagged tail. Only 5.4 gram with live hinge. Thanks for Ah MAK lending the vacumum pump to me. 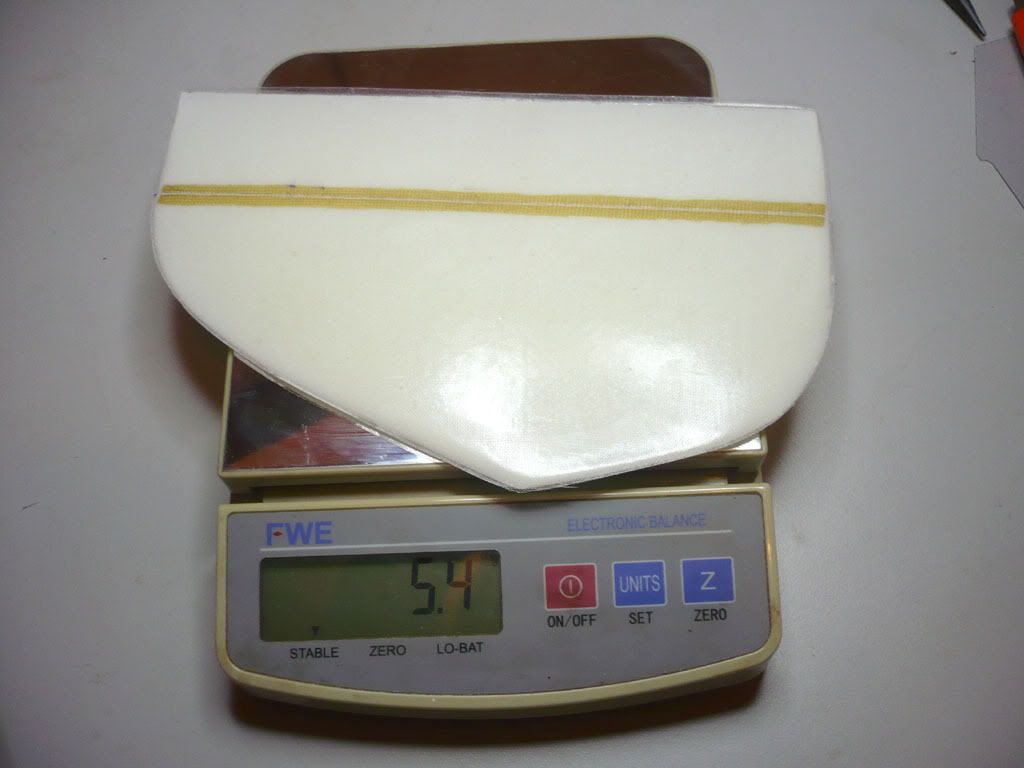
|
|
| Author: | CM Cheng [ Sat Jul 18, 2009 3:52 pm ] |
| Post subject: | |
Oh very nice Which type of foam is used for the core? Is it pink foam? And I don't see reinforcement at the root. Is it only a test? |
|
| Author: | Ah Pong [ Sun Jul 19, 2009 11:27 am ] |
| Post subject: | |
CM, That was green foam. Orginally, I intended to put carbon fabric for reinforcement, but run out of stock. (All my CF had gone to Stanley's broken planes, leaving only glass frbric in my workshop) |
|
| Author: | K.Y.Mak [ Sun Jul 19, 2009 1:02 pm ] |
| Post subject: | |
Ah Pong wrote: :P
leaving only glass frbric in my workshop) I have plenty of grass fiber in my garden. You can have as much as you need |
|
| Author: | Stanley [ Mon Jul 20, 2009 11:46 pm ] |
| Post subject: | |
Ah Pong wrote: :P
CM, That was green foam. Orginally, I intended to put carbon fabric for reinforcement, but run out of stock. (All my CF had gone to Stanley's broken planes, leaving only glass frbric in my workshop) Oh! let me count: One repair of bites for both left and right wings of Aris One major repair for fuse and wing root of FR3 What else? Just two! Although my 60" Shooting Star did require your massage once, it's nothing to do with CF. It seems that I only used up less than a meter of CF from you! Anyway, if you still have some CF left behind, my Ceres and Viking are waiting and happy to eat them up |
|
| Author: | Ah Pong [ Wed Jul 22, 2009 10:40 pm ] |
| Post subject: | |
Stanley wrote: Quote: Oh! let me count: One repair of bites for both left and right wings of Aris One major repair for fuse and wing root of FR3 What else? ............ I consider that was a very impolite reply. Tell me if I am wrong. Do you remember how many Aris you have? And how many time the two Aris' have a broken neck ? I am not going to count it, as it was only the corner of an ice-bxxxx ( forgotten how to spell due to drunkenness) but I could offer, whenwever my plane crashs and you could repair it at the same level of craftmanship, I would rather pay you a meter of 3K CF on each occasion! |
|
| Author: | Ah Pong [ Wed Jul 22, 2009 10:45 pm ] |
| Post subject: | |
Sorry Ah Yeung, as I have hi-jacked your thread. If you do not mind, could you amend the topic to ' Pong Pong building a 'DLG' ? |
|
| Author: | Ah Pong [ Wed Jul 22, 2009 11:21 pm ] |
| Post subject: | |
Dear fellows, After the attempt for building a moldies on my own, I realize that, buying a moldies from european is still at a reasonable price, even the euro has gone up in recent months. What we see on the final produce, is a thin layer of frabic, some balsa or rohecell, etc, but in fact, a lot of consumables had been discarded. For example, a consider amount of solvant has to use after using the air-brush for cleaning. No matter how small the area you were repairing. And more importantly, at least 2 to 3 layers of paint must be used for a fine finishing. Other consumables that you would never seen in the final product included: Sanding papers, masking tapes, maylar, sanking tubes, wax, PVA (release agent), brushes for epoxy, broading paper, gloves, surgical masks (one mask and a pair of gloves each night of work), syringes, CA (AA glue), drill bits / sanding bits, polish agent, wraping clothes or tissue, fillers (micro ballon or fabric) etc,.... lastly, the most expensive investment is your TIME !! |
|
| Author: | Ah Pong [ Sat Nov 07, 2009 6:27 pm ] |
| Post subject: | |
Dear all, I finally make the boom today after the finish of the fuse 5 months ago. Step 1: Make some tools for rolling the video tape. A tapered wooden pole, and a stand 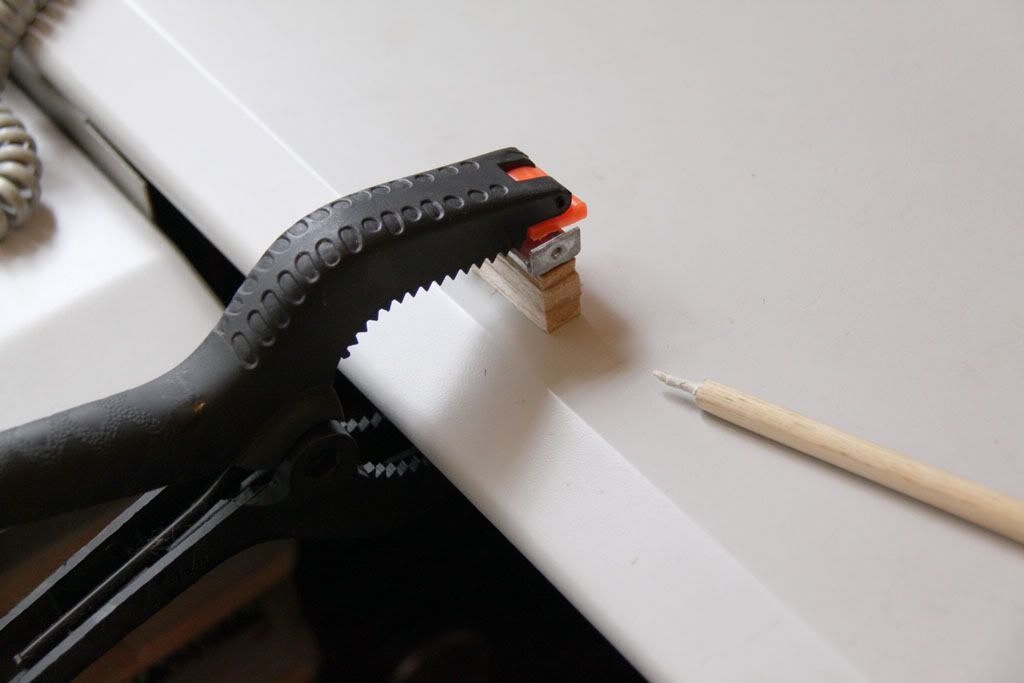
Modify a servo (make it turns like a motor) and put a switch on it. Also put a servo disc on the wooden pole. 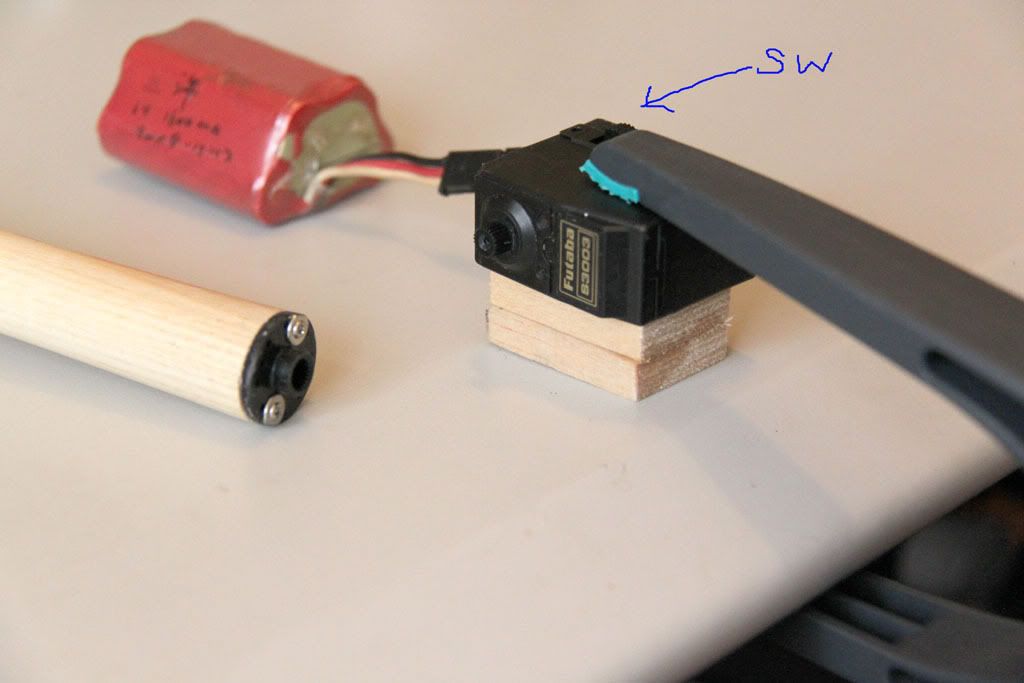
Make a video tape dispenser for even pressure applies on the pole. 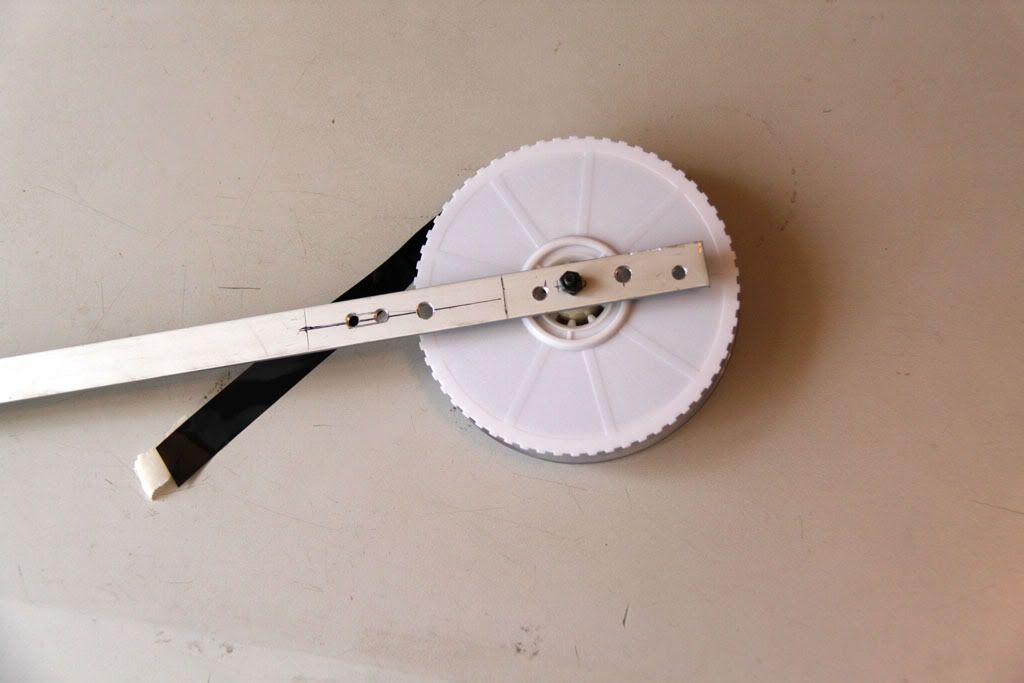
Step 2: Wrapping the pole with video tape. 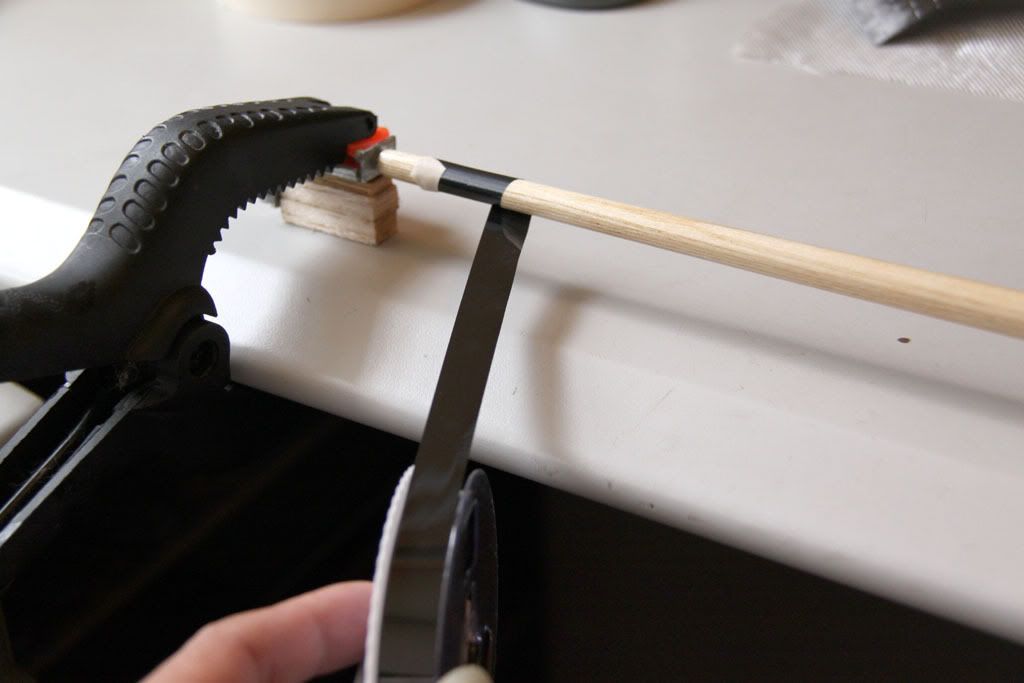
Step 3: Cut the uni-carbon into size I need. 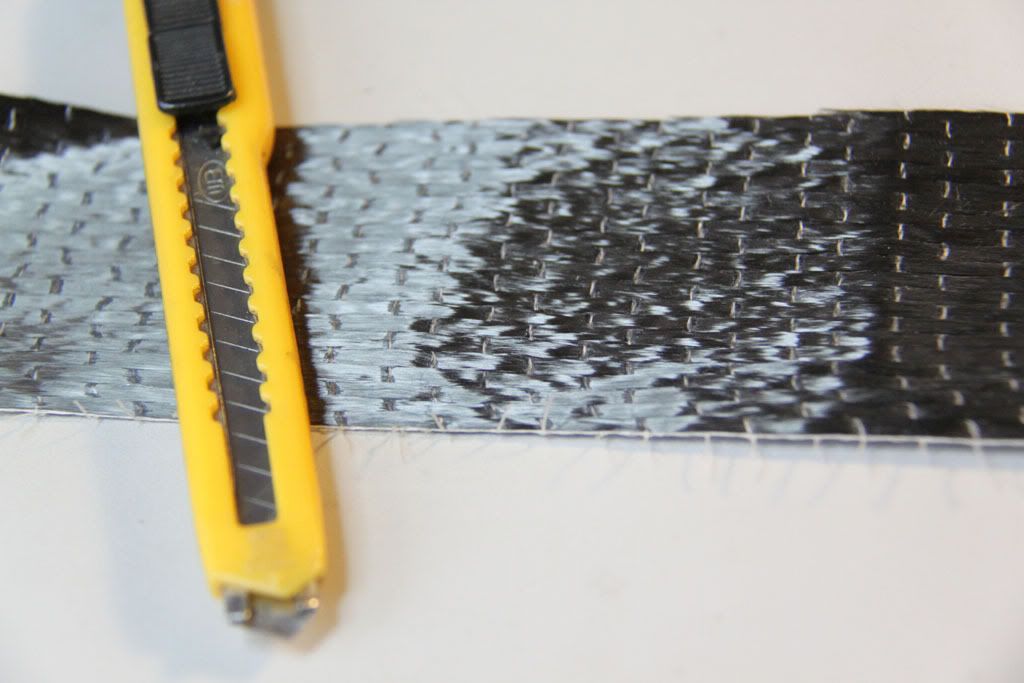
Step 4: Wet out the frabic. 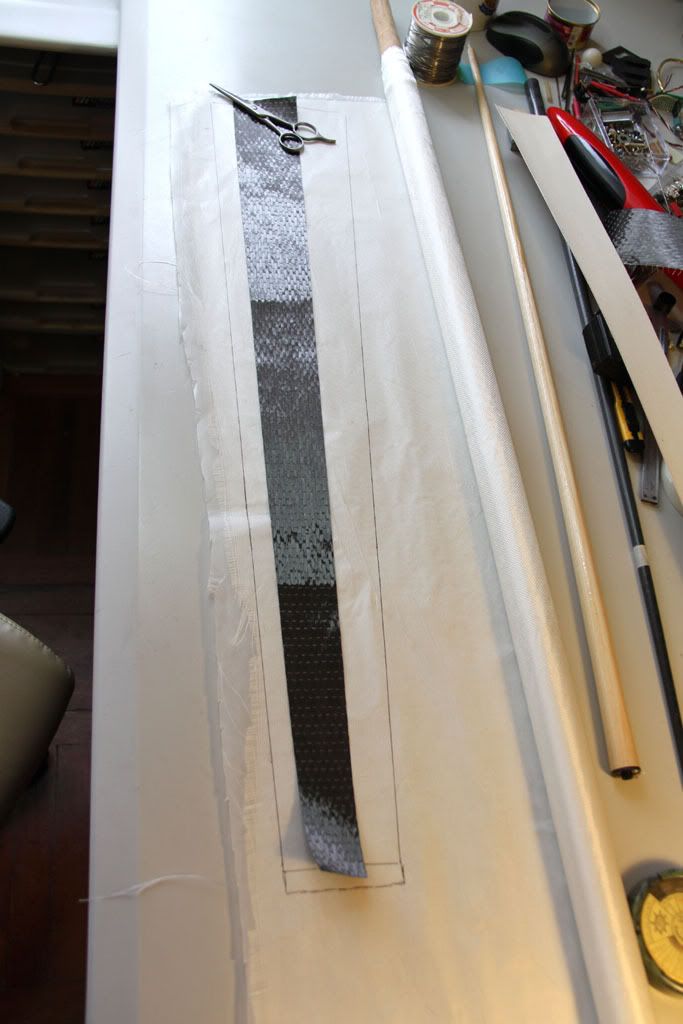
Step 5: Put several layers of frabic together and roll them on the pole (No picture this time, as to my messy hands). Step 6: Put the pole on the motor set, and repeat step 2. This makes the video tape wrapping the carbon frabic and squeesing all the air and excessive epoxy (no picture again. Messy hands) Step 7: Soak the excessive epoxy away every 5 minutes. 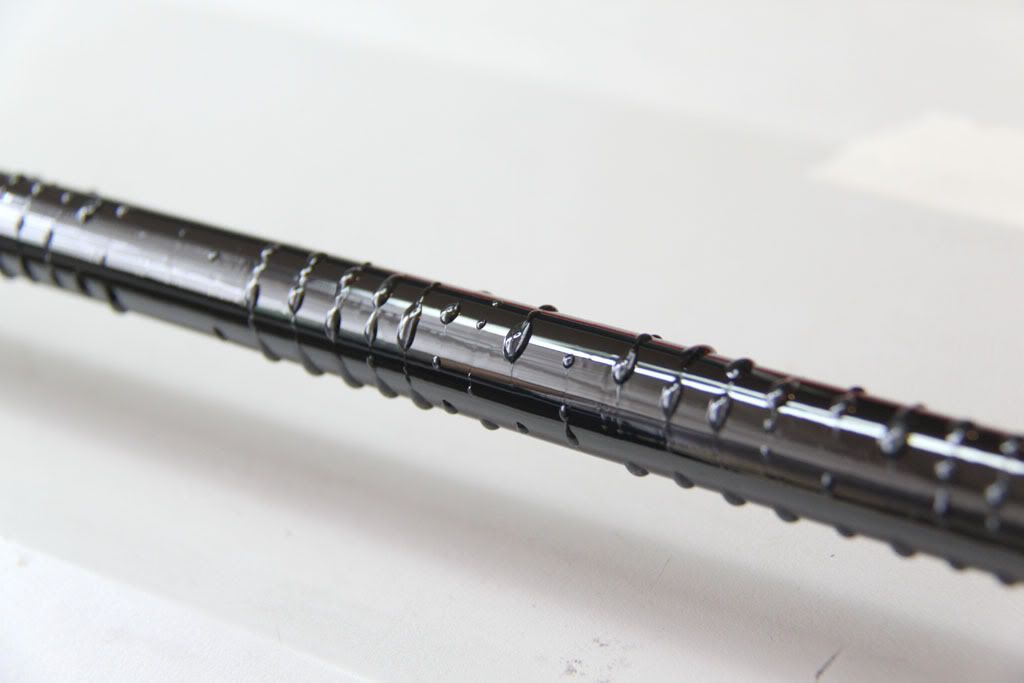
Step 8: Wait for the epoxy sets. 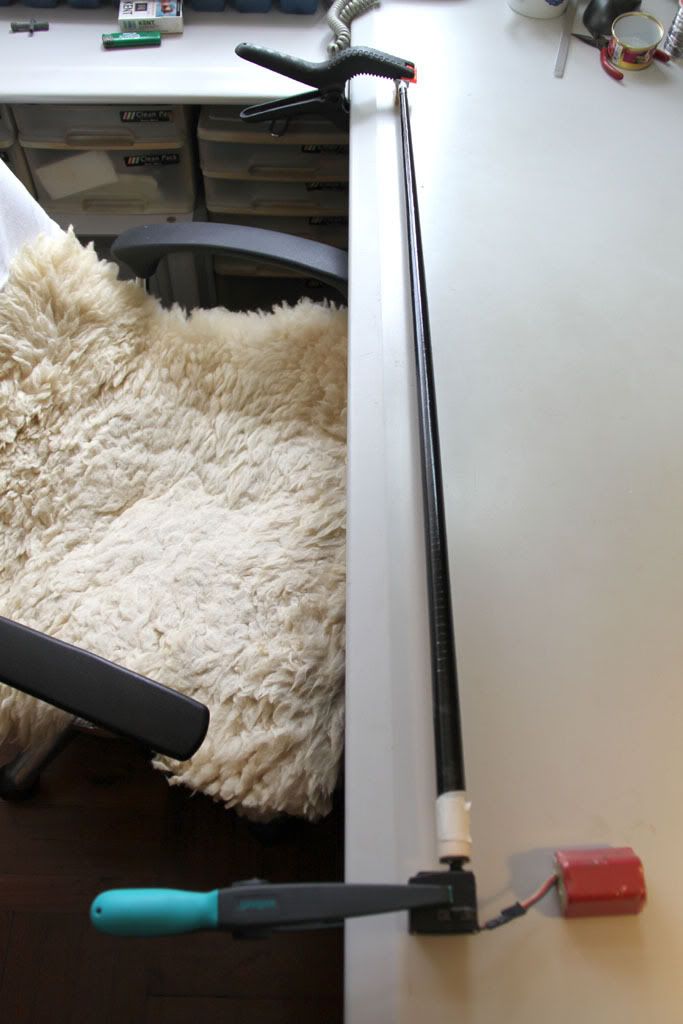
Step 9: Removing the outter layer of video tape. The boom seems OK. 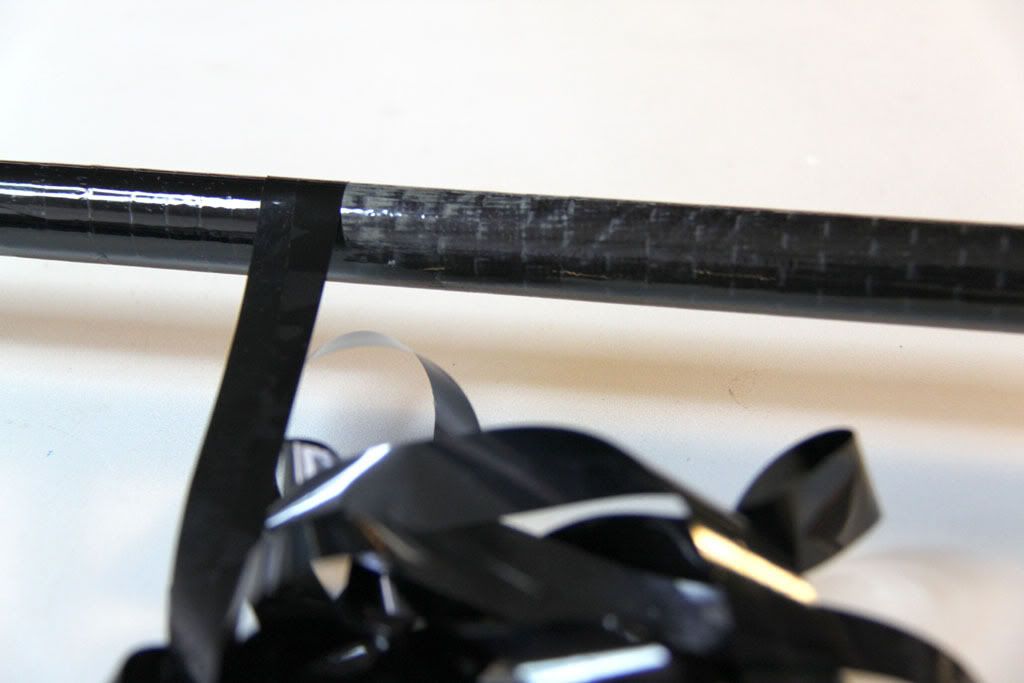
Will update later. |
|
| Author: | Ah Pong [ Tue Dec 15, 2009 10:48 pm ] |
| Post subject: | |
Hi folks, The first boom I made was a bit heavy as I have used 6oz Uni-CF. Having gotten some 3oz uni-CF, and some 1K CF, and finally made a light boom (this is the 3rd attemp): Fitted to the fuse: 
I think it looks better if the 1k CF is at the outter side : 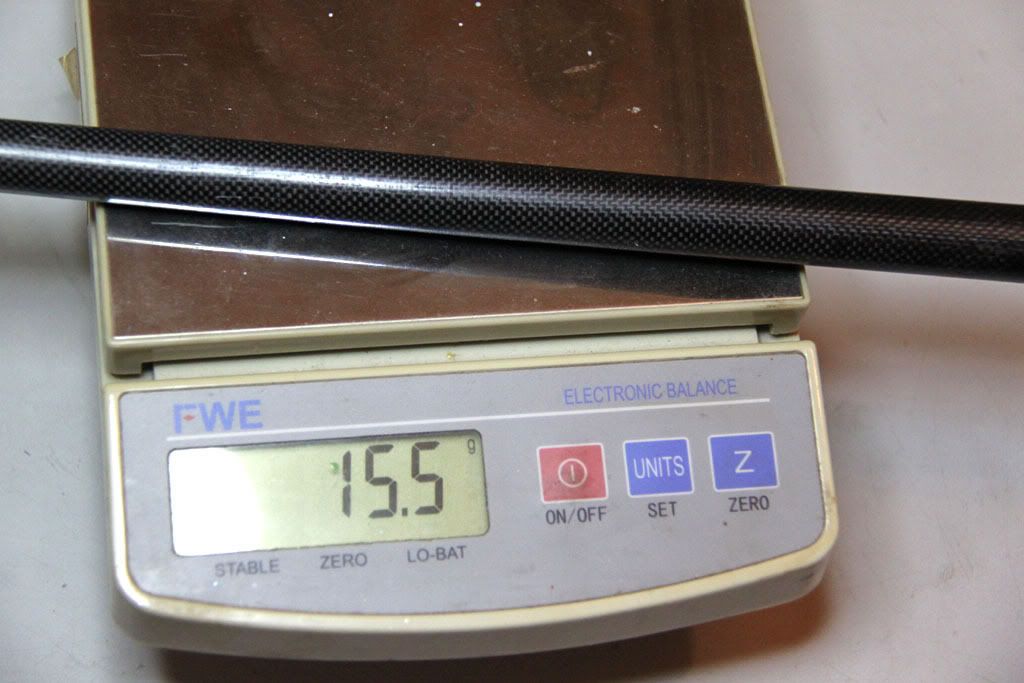
15.5g (boom only) is not too bad, right ? How do you guys think ? |
|
| Author: | K.Y.Mak [ Tue Dec 15, 2009 11:45 pm ] |
| Post subject: | |
Well done Waiting to see your wings |
|
| Author: | Ah Pong [ Thu Jan 14, 2010 10:00 pm ] |
| Post subject: | |
Hi folks, Do you guys have any broken guiter that you don't want ? I need a little component from a guiter like the picture below for my hot-wire cutting blow: 
|
|
| Author: | Ah Pong [ Sun Jan 31, 2010 7:07 pm ] |
| Post subject: | |
Hi folks, My vacaum bump is done and working fine: 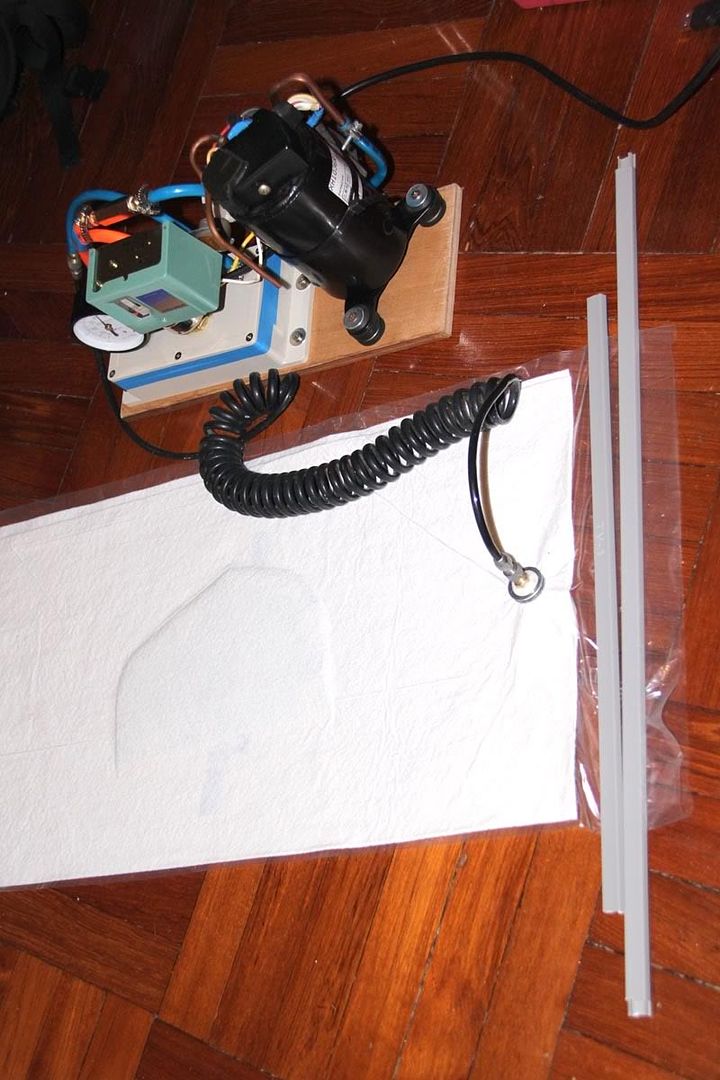
|
|
| Author: | K.Y.Mak [ Mon Feb 01, 2010 10:56 am ] |
| Post subject: | |
Ah Pong wrote: Hi folks,
My vacaum bump is done and working fine: Very nice and tidy but where is the vacaum reservoir ? |
|
| Page 1 of 2 | All times are UTC + 8 hours |
| Powered by phpBB® Forum Software © phpBB Group http://www.phpbb.com/ |
|